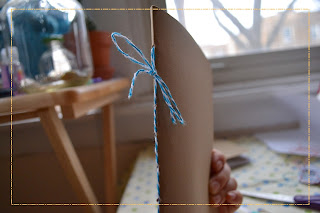
Simple Series 02: Make your own journal/field book
Materials:
** These might be things you already have at home. Which is kinda nice.
1. Cardstock/Craft paper - I bought the polka dotted one for about $0.50/sheet. I bought the craft paper (brown) $3/pack - each pack has about 50(?).
2. Something pointy to poke holes in paper. I happen to have that pointy tool -- you can also use a thumb tack.
3. Twine/Baker's twine/Embroidery Floss. You will need at least 20 inches - $0.50-$3.
4. Computer Paper - I also like using graph paper! - I use about 10/notebook.
5. Big-Eyed Needle - It just needs to be big enough for the twine to go through. Like a tapestry needle. I don't know about price. Probably no more than $1-3.
6. OPTIONAL: Corner rounder -- I have the Martha Stewart one. It's kinda pricey - about $10.
Step 0(Optional): Round out the corners of all papers
Step 1: Fold
Fold everything in half - cardstock and computer paper. Cardstock on the outside. Make sure yours looks like the one above. If it doesn't... I don't know how to help you.
Step 2: Make Holes
Poke holes along the center fold -- I like to poke from the inside. It's just easier. I just guess the spacing but you can measure with a ruler if you don't trust yourself.
Step 3: Sewing
Put twine through the needle. Put the needle through the first hole -- I start from the outside (cardstock side) -- Leave about 3in of twine on the outside(top left). Then weave through the holes (top right). Then weave back down to where you started (bottom left). Once you have the whole thing weaved through, go through the second hole one more time (bottom right). It should look like the picture below:
Step 4: Tie it.
I double knot the first knot. Then tie a cute bow. I double knot the bow too. Then cut the excess twine.
Step 5: (Optional) Add stuff
On my notebooks, I always add an envelope on the back page to hold secret stuff -- or just stickers.
Because I love to journal, I go through one of these a month(easily) -- So what I do is, make a month indicator - a "3" for March and a cute little lace thing.
Then the 2nd and 3rd page is my March calendar. I just used some more craft paper to make the calender -- everything on the page is just handwritten.
Personalize it anyway you want to.
** GREAT gift idea for friends who love to stay organized. You can make them one for each month of the year.
EL Fin:
Mr. Peter the Pig says, "Stay cool."


No comments:
Post a Comment